When water is on the floor, or a pipe starts spraying, the first minutes matter most. Knowing exactly which valve to turn, and in what order, can contain a leak, protect drywall and flooring, and simplify the eventual repair. This article shows you how to find your home’s main shutoff valve and fixture stops, how to choose the right one for common problems, what to avoid when a valve is stubborn, and how to stabilize the situation safely until a professional can make a permanent fix. A little practical familiarity with ball valves, gate valves, and angle stops today can prevent a much bigger mess the next time a supply line or fitting fails.
1. Map Your Home’s Shutoffs: Main, Meter, and Fixture Stops
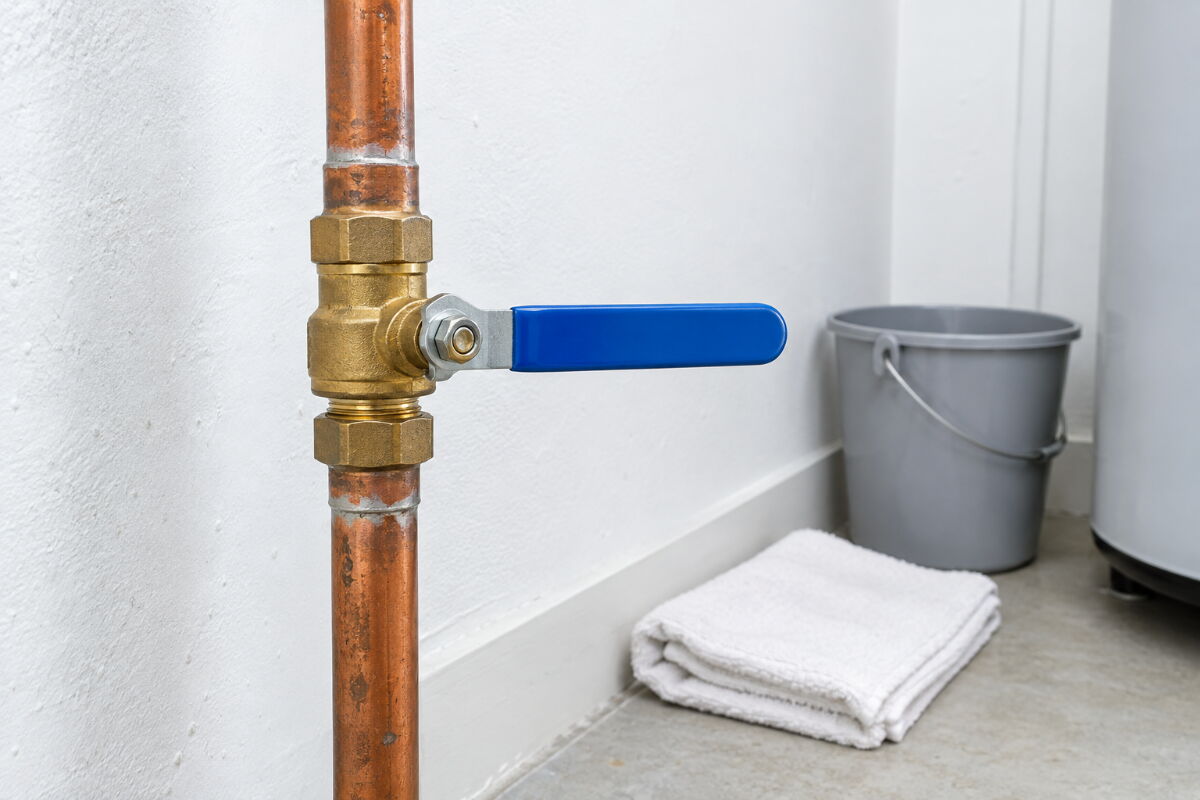
Start with the main shutoff. In many detached homes, it sits where the water line enters the building, often near the water meter in a basement, utility room, or crawlspace. A quarter-turn ball valve has a lever handle that turns 90 degrees. When the handle is perpendicular to the pipe, the water is typically off. Older homes may have a gate valve with a wheel handle that takes multiple turns. These can seize or leak when forced, so avoid applying excessive pressure.
Find and label your main valve now. If you live near Papillion, you can schedule with a local plumbing service in Papillion, NE after you control the flow, but knowing where your shutoffs are before an emergency can save valuable time.
Next, locate fixture stop valves, sometimes called angle stops or straight stops. These small shutoffs typically sit under sinks on the hot and cold supply lines, behind a toilet, and near appliances with dedicated valves, such as dishwashers or refrigerators.
Outside, note hose bibs and any interior shutoff that controls them. Homes in colder climates may include a stop-and-waste valve that lets you drain the line before winter. Take photos of accessible valves, note what each one controls, and avoid forcing any valve that feels seized or fragile.
2. Immediate Actions When Water Is Where It Should Not Be
If a supply tube bursts under a sink, use the nearest accessible angle stop if you can reach it safely. Turn the valve according to its design until the water stops. If the valve will not operate normally, or reaching it would put you near electrical hazards, go to the main shutoff instead.
After shutting off the main, opening an accessible faucet can help relieve pressure and drain remaining water in a controlled location. Keep buckets and towels available for residual water.
If water is approaching electrical outlets, wiring, appliances, or the electrical panel, do not step into standing water to reach electrical controls. Stay clear of the area and contact appropriate emergency or professional help when electrical safety is uncertain.
Water heaters also require care when the home’s water supply has been interrupted. Do not operate controls or restart a heater unless you know the unit remains properly filled and you can follow the manufacturer’s instructions. Leave gas and electrical connections to qualified professionals if you’re unsure.
Never use the temperature and pressure relief valve on a water heater as a water shutoff. It is an important safety device and is not intended to isolate the plumbing supply.
3. Pick the Correct Valve for the Problem You See
Use the closest functioning valve that safely isolates the leak without unnecessarily shutting down the entire house.
For a toilet supply or fill problem, the small stop valve behind or beside the toilet may let you isolate that fixture while leaving the rest of the plumbing available.
For a dishwasher supply leak, use its dedicated shutoff if one is clearly identified and safely accessible. If the appliance shares a valve or the plumbing arrangement is uncertain, shutting off the main may be safer than experimenting during an active leak.
Some situations clearly call for shutting off the main. A spray from a damaged pipe in a wall or ceiling, a failed washer supply hose, or a leak from an inaccessible connection can release water quickly. Turning off the main may prevent significantly more damage.
That tradeoff matters. A fixture stop causes less disruption, but an old, corroded, painted over, or seized valve can fail when forced. If a valve doesn’t operate with reasonable hand pressure, stop rather than risk a broken stem or larger leak.
4. Mistakes That Escalate a Small Leak
Forcing a stuck gate valve is a common mistake. The stem or internal components can fail, potentially leaving the valve unusable while water is still flowing. If the valve will not turn normally, use another appropriate shutoff and arrange professional repair.
Avoid aggressively tightening nuts or fittings to stop an active leak. Excessive force can damage seals, crack fittings, or turn a small leak into a larger one.
Do not use the water heater’s temperature and pressure relief valve as a shutoff. It serves a safety function and should not be treated as a routine isolation control.
Avoid overtightening compression connections or plastic drain fittings. These components can deform or crack if you apply too much force.
During cold weather, disconnect garden hoses from outdoor faucets when appropriate for the installation. A hose left connected during freezing conditions can trap water and damage pipes inside the wall.
5. After You Contain It: Document, Clean, and Prepare for Repair
Once you control the water, take clear photos or a short video of the leak source, the valve you used, and any visible damage, such as a cracked supply tube, corroded fitting, or failed stop valve.
Note when you discovered the leak and when you shut off the water. This information may help with repair records, warranties, or insurance documentation.
Remove standing water as soon as it is safe to do so. Use towels, mops, or a suitable wet vacuum on appropriate surfaces. Use fans or dehumidification only when electrical conditions are safe.
Water that has entered walls, ceilings, flooring, insulation, or cabinets may require more extensive drying than the surface appearance suggests. Large leaks or contaminated water may warrant professional water damage assessment.
Do not restore water simply to test a damaged connection if the failed component has not been repaired.
6. Restore Water Carefully After Repair
Once the repair is complete and the plumbing is ready to be repressurized, restore water according to the valve and plumbing system requirements.
Opening the main gradually can reduce sudden pressure changes. Open an accessible faucet to let trapped air escape while the system refills.
Inspect repaired and nearby connections for signs of dripping once you restore pressure. If a valve begins leaking around its stem or another connection starts dripping, shut the water off again and have the problem corrected.
If repeated supply line failures, banging pipes, or unusually strong water flow suggest excessive pressure, ask a plumber to measure the home’s water pressure and evaluate the pressure regulator if one is installed.
Know the Shutoffs Before the Next Leak
Leaks feel urgent, but the response can still be methodical. Know where your main shutoff and fixture stops are, choose the least disruptive valve that safely isolates the problem, and avoid forcing old or seized plumbing components.
Stay especially cautious when water is near electricity, gas appliances, water heaters, or inaccessible piping. In those situations, shutting off the water and waiting for qualified help is safer than continuing to troubleshoot.
A few minutes spent mapping and labeling valves before an emergency can protect drywall, flooring, cabinets, and belongings when a supply line or fitting eventually fails. Knowing where to shut off the water is one of the simplest preparations a homeowner can make for a plumbing emergency.