Walls are the quiet background characters of a building. They do not complain when a chair bumps into them, when a child treats them like a canvas, or when a leaking pipe sends a watery surprise down their surface. They simply stand there, collecting dents, stains, nail holes, fingerprints, and the occasional mystery mark that nobody in the household wants to claim.
A damaged wall can make an entire room look neglected, even when the furniture is attractive and the floor is spotless. Fortunately, restoring wall surfaces does not always require a major renovation. With careful inspection, suitable materials, and a little patience, many interior walls can be transformed from battered and gloomy to smooth and welcoming.
Read the Wall Before Reaching for Tools
The first step in wall restoration is not grabbing a putty knife. It is observing the damage closely. A crack near a doorway may have a different cause from a stain below a window. A small round hole is usually a simple repair, while a long, spreading crack may deserve more attention.
Find patterns that suggest subsurface activity. Normal building movement may cause corner cracks. Remaining moisture might cause brown or yellow discolouration. Poor adhesion, dampness, or water behind the finish can cause peeling paint. Soft drywall is significant since it may be weak.
The wall is not being dramatic for fun. Damage often leaves clues. Following those clues can prevent a quick cosmetic patch from becoming a repeat performance.
Separate Cosmetic Damage From Structural Concern
Not every imperfection is an emergency. Small nail holes, shallow dents, and minor scratches are usually cosmetic issues. They can often be filled, sanded, primed, and painted without disturbing a large section of the wall.
More significant indicators require a different response. A growing fissure, a mushy wall, or moisture-related damage may suggest a broader property issue. If a plumbing leak, roof issue, or ventilation problem remains, fresh paint can reveal stains.
Repairing the visible mark without handling its cause is like putting a tiny bandage on a leaking garden hose. It may look optimistic for a few minutes, but the water has other plans. Identify the source before investing time in the finish.
Match the Repair Method to the Damage
Different wall problems require different techniques. Using the wrong material can make a repair stand out more than the original damage.
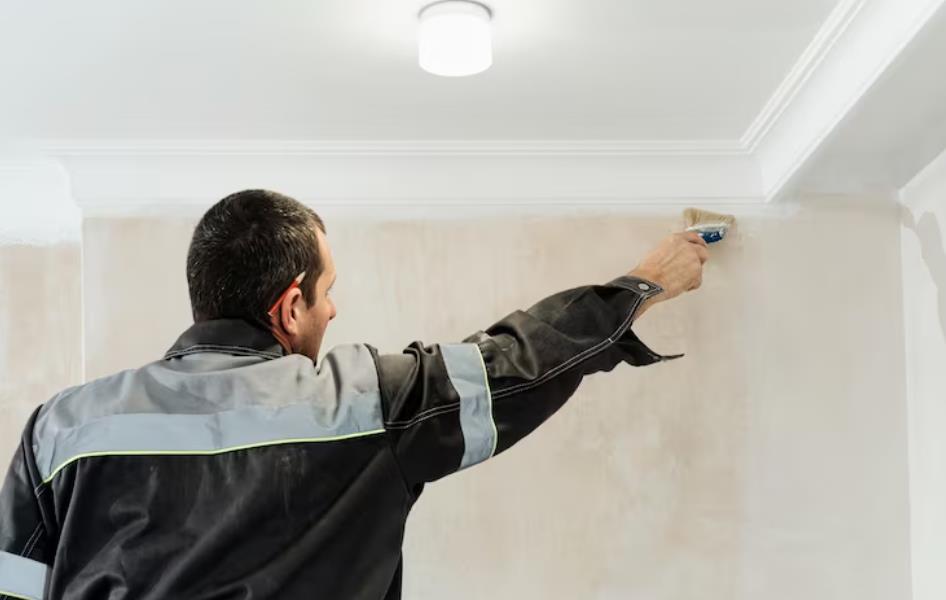
Small holes may need only lightweight joint compound or patching material. The compound should be pressed into the opening, allowed to dry, and then sanded gently. Applying several thin layers is usually more effective than creating one thick mound that resembles a miniature pancake.
Shallow dents often benefit from a skim coat. This involves spreading a thin layer of compound over the damaged area and feathering the edges outward. The goal is to create a gradual transition rather than a raised island in the middle of the wall.
Larger holes may require a patch, backing support, or replacement drywall. When the damaged section is extensive, cutting away weak material and installing a new piece can create a stronger and cleaner result. The seams must then be taped, covered with compound, dried, and sanded until they disappear into the surrounding surface.
Deep cracks may also need reinforcement. Simply filling a moving crack can result in the same crack returning later, perhaps with the confidence of an unwanted houseguest.
Know When Professional Repair Is Worthwhile
Some wall repairs are manageable for a careful property owner. Others are better handled by an experienced drywall professional. Large holes, multiple damaged areas, sagging surfaces, extensive water damage, and repairs in highly visible rooms can be difficult to blend without the proper tools and technique.
Professional drywall repair can involve more than filling a hole. The damaged material may need to be removed, framing may need inspection, and replacement sections must be secured correctly. Taping and finishing require control because every ridge, dip, and uneven edge can become obvious once light strikes the painted wall.
Professionals can also help when the existing wall has a particular texture. Matching orange peel, knockdown, or other finishes is a skill of its own. A smooth patch surrounded by textured paint can look like a bald spot on a very confused lawn.
Treat Moisture Damage With Extra Care
Water damage should never be treated as an ordinary stain. Even after the surface dries, moisture may have weakened the drywall, encouraged mold growth, or affected insulation and framing.
Before repairing the appearance, confirm that the source of moisture has been corrected. This may involve plumbing, roof drainage, window sealing, bathroom ventilation, or exterior maintenance. The affected material should be evaluated for softness, odor, discoloration, and deterioration.
A stain blocking primer may help prevent old discoloration from showing through new paint. However, primer is not a substitute for drying and repairing the affected area. Painting over wet or weakened drywall is a little like putting a fancy tablecloth over a plate of soup. The surface may look improved briefly, but the problem is still underneath.
Create a Smooth Surface That Accepts Paint
Successful painting begins before the paint can is opened. Once a patch has dried, inspect it from several angles. Natural light and overhead lighting can reveal ridges that are easy to miss from directly in front.
Sand repaired areas carefully with fine sandpaper or a sanding sponge. Avoid aggressive sanding that damages the surrounding paper or creates a depression. Remove dust with a clean, slightly damp cloth, allowing the wall to dry before priming.
Primer helps unify porosity. Fresh joint compound absorbs paint differently from old painted drywall, so skipping primer can leave repaired areas looking dull, shiny, or uneven. A properly primed surface gives the topcoat a more consistent appearance.
If the wall has a texture, the texture should be recreated before priming and painting. Allow each product to dry according to its instructions. Rushing the process usually creates extra work, which is the home improvement version of stepping on a rake.
Paint With the Whole Room in Mind
A repaired wall may need more than a tiny dab of matching paint. Even when the color name is the same, older paint can fade or change slightly over time. A small touchup may appear as a noticeable rectangle under certain lighting.
A corner, doorway, or architectural division is the best place to cease painting for consistency. Match the finish’s shine. Flat, eggshell, satin, and semi gloss paints reflect light differently, therefore a wrong sheen can show a repair even in near colors.
Use clean rollers and brushes, and avoid overworking the paint as it begins to dry. Thin, even coats generally look better than one heavy coat filled with drips and optimism. Protect trim, flooring, and furniture before beginning because paint has an impressive ability to travel where it was never invited.
Make Wall Care Part of Routine Cleaning
Regular wall care is not glamorous, but neither is discovering a collection of fingerprints around every light switch. Dust walls occasionally with a soft cloth or vacuum attachment. For washable finishes, use a lightly damp sponge and mild cleaning solution. Test an inconspicuous area first, especially on older paint.
Fix tiny dents early. Minor marks are easier to heal before dirt or repetitive touch widens them. Avoid continuous rubbing by placing furniture far enough apart. Wall damage often comes from door handles, chair backs, and hallway activity.
Humidity deserves attention as well. Bathrooms and kitchens should have adequate ventilation, and damp areas should not remain closed and steamy for long periods. A dry wall is generally a happier wall, even if it has no ability to send thank you cards.
Use Lighting to Check the Finished Work
Wall imperfections can hide in soft daylight and become obvious under strong artificial lighting. After repairs and painting, inspect the surface in the morning, evening, and under the room’s regular fixtures.
A movable lamp can help reveal shallow ridges or dips. Shine it across the wall from the side rather than directly toward it. This method exposes uneven areas before they become permanent visual distractions.
If a flaw appears, resist the urge to apply a giant blob of compound immediately. Mark the area, determine whether it is a high spot or low spot, and correct it with a controlled amount of material. Good finishing is less about heroic quantities and more about small, deliberate adjustments.
FAQ
How long should a patched wall dry before painting?
Drying time depends on the thickness of the compound, room temperature, humidity, and ventilation. Thin layers may dry within several hours, while deeper repairs can require longer. The patch should feel dry, firm, and evenly colored before sanding and priming.
Can a small wall hole be repaired without replacing drywall?
Many small holes can be filled without replacing the surrounding drywall. Lightweight compound works for tiny nail holes, while larger openings may need a patch or backing material. The repair should be strong enough to resist normal contact after it has been finished and painted.
Why does a repaired area show through fresh paint?
A repaired spot may remain visible because it was not sanded evenly, the surface was not primed, the paint sheen does not match, or the surrounding paint has aged. Strong lighting can also highlight slight differences in texture or absorption.
Should water stained drywall always be replaced?
Not always, but the material should be evaluated carefully. If it is soft, swollen, crumbling, moldy, or still damp, replacement may be necessary. Painting over damaged drywall will not restore its strength or prevent the stain from returning.
Is professional drywall repair useful for textured walls?
Yes. Textured walls can be difficult to match because the pattern, thickness, and application technique affect the final appearance. Experienced repair specialists can recreate the texture more consistently and help the repaired section blend with the existing wall.
How can future dents and holes be reduced?
Use wall protection behind frequently moved furniture, install door stops, secure loose fixtures, and avoid placing heavy objects where they can fall against the surface. Promptly repairing small damage also keeps minor problems from becoming larger and more noticeable.